

Custom Domain Management is available in Shopware SaaS since version 6.7.12.0.
Domains are business-critical, and some of the actions around them – configuring a redirect, for example – previously required a support ticket. You can now handle these yourself under Settings → System → Domains:
Connect a domain – now with verified ownership
Enable mailing for your own domain
Redirect one of your domains to another
Every shop still keeps its default domain (e.g. my-shop.shopware.store), which can't be removed. That guarantees your shop stays reachable no matter how you configure the rest.
Connecting a domain now requires proof of ownership
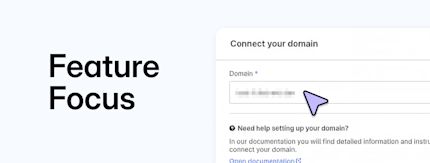
When you connect a new domain, you enter it in the Administration and then create a DNS record containing a verification value we provide. The domain is only connected once that record resolves.
Two practical notes:
DNS changes can take up to 48 hours to propagate. The verification value doesn't change, so you can leave the dialog and come back later.
Keep the record in place. We re-check ownership regularly.
Domains connected before this requirement existed keep working, but you can verify them retroactively – the verification value is on the domain's card in the same settings module.
Why this matters: ownership verification closes the door on someone else pointing a domain they don't control at infrastructure, and it's a prerequisite for the email sending setup below.
Once connected, a domain needs routing records before you can assign it to a Storefront sales channel. If you're using it for a Headless sales channel with Shopware Frontends, routing DNS isn't required.
Send email from your own domain
By default, transactional mail goes out from an address on the shop's default domain, such as store+12345678@mail.shopware.store. You can now switch to your own domain, and doing so comes with real deliverability advantages: mail sent from a properly authenticated custom domain is far less likely to land in spam folders, and your sending reputation is built and tracked on your domain alone.
To set up mailing with your own domain follow these steps:
Open the domain, go to the Mailing tab, and click Enable mailing.
Create the DNS records shown. They're validated automatically in the background; it can take up to 24 hours for the status to turn Valid.
Go to Settings → Basic information and, under Sender email, pick your domain and enter the local part (no-reply, info, and so on).
Behind this sits a change of provider: we're moving from Mailgun to Amazon SES, with a dedicated tenant per shop. That isolation is what makes the difference. With a dedicated tenant, your delivery rate reflects your own sending practices only, and reputation is measured per domain.
Redirect traffic between your domains
Redirects are the part of a domain change that quietly costs the most when it goes wrong – lost traffic, dropped rankings, a go-live that slips because someone is waiting on a ticket. You can now configure them yourself.
On a domain's Redirect tab, point all of its traffic to another domain and choose between a temporary redirect (307) and a permanent redirect (308). Use 308 for a genuine, permanent move so search engines transfer ranking signals; use 307 when you may revert.
The common cases this covers: consolidating www and non-www, and switching from an old domain to a new one during a migration or re-platforming.
Two constraints worth knowing before you plan a migration:
The redirect target must already be connected to the same shop. You can't redirect to an arbitrary external domain.
A domain that is already the target of another redirect can't itself be redirected. No redirect chains.
Only full-domain redirects are supported. Path-based redirects (/old-page → /new-page) are not.
Removing a domain
A domain can be removed from the Configuration tab once it's no longer in use – meaning it isn't assigned to a sales channel, isn't the target of another domain's redirect, and isn't used for email sending.
Next steps
Verify ownership of any domains you connected before this release
Enable mailing on your custom domain so your emails are recognised as coming from your brand
The next time you need to configure a redirect you can do it directly in the Administration panel
Full setup instructions, including DNS guidance for common hosters and troubleshooting, are in the Shopware docs.